Hi, welcome to The TechWeirdo. In today's post we are going to create a dedicated page to display all our tags on a seperate page for Ghost blogs. You can view a live example of this on my site itself at TechWeirdo.net/categories page. Now I built this around the default Source theme, but it should also work with Casper, although you may need to do some CSS changes for that.
Now, this process will be a little technical but easy, and you should be able to follow the steps easily. We are going to modify the theme file here. And for easier communication I am going to call this page as category page.
Step 1: Download the Theme file
To modify the theme file first you need to download the Source theme running on your site. To do that-
- Go to the Ghost Admin panel
- Then go to settings and find design and branding, and select customise.
- Select change theme and go to the Installed tab > download the active theme by clicking on the menu.
- Now your theme file will be downloaded on your computer, extract that in a folder.
Step 2: Add these following files to the folder
Now we need to things a handelbar file (ends with .hbs) to create the structure of the category page. And a css file to style it, now I like to add the css later via the admin panel to make style modification easier.
First create a new file and name it page-categories.hbs then copy the below file and paste it.
{{!< default}}
{{!-- The tag above means: insert everything in this file into the body of the default.hbs template --}}

{{#post}}

<main class="gh-main">
    <article class="gh-article {{post_class}}">

        {{#match @page.show_title_and_feature_image}}
            <header class="gh-article-header gh-canvas">
                <h1 class="gh-article-title is-title">{{title}}</h1>
                {{#if custom_excerpt}}
                    <p class="gh-article-excerpt is-body">{{custom_excerpt}}</p>
                {{/if}}
                {{> "feature-image"}}
            </header>
        {{/match}}

        <div class="l-content">
    <div class="l-wrapper" data-animate="fade-up">
      <div class="l-tags-container">
        {{#get 'tags' limit='all' include='count.posts'}}
          {{#foreach tags}}
            {{#if count.posts}}
              <div class="m-tag-card">
                <a href="{{url}}" class="m-tag-card__link {{#unless feature_image}}no-picture{{/unless}}" aria-label="{{name}}">
                  {{#if feature_image}}
                    <img class="m-tag-card__picture" src="{{img_url feature_image size="m"}}" loading="lazy" alt="">
                  {{/if}}
                  <div class="m-tag-card__info {{#unless feature_image}}no-picture{{/unless}}">
                    <h4 class="m-tag-card__name">{{name}}</h4>
                    <span class="m-tag-card__counter">
                      {{plural count.posts empty=(t "No posts") singular=(t "1 post") plural=(t "% posts")}}
                    </span>
                  </div>
                </a>
              </div>
            {{/if}}
            {{else}}
              <p class="m-not-found">
                {{t "No tags found :("}}
              </p>
          {{/foreach}}
        {{/get}}
      </div>
    </div>
  </div>

    </article>
</main>

{{/post}}
page-categories.hbs
Now, select all the files that you extracted from the theme and zip them, and give it a new name like source-modifed.zip. If you keep the name source.zip it will change background to default theme after every update.
Step 3: Now upload the theme File to your site
Follow the steps in step 1 to the customise tab of your site design. Do to modify theme and upload your newly modified theme file.
Step 4: Publish a new page with the name categories
Now publish a new page and give it the name Categories and path categories. If you want to use any other name then that is fine to. You just need to save the .hbs file with a different name, like page-yourchoice.hbs and publish a page with the same name. Now you have a categories page, but without any style. Now do not add any feature images or anything, it does not look good, only keep the title.
Step 5: Style the categories page
Now to style the categories page go to the right side ar menu on the page (the menu where you put the meta tags etc), and tavel to code-injection option. You don't need a syringe here. Just copy the CSS from below and paste it in the header section.
<style>
body {
  background-color: auto;
}

.l-tags-container {
  width: 92%;
  margin: 0 auto;
}

@media only screen and (min-width: 48rem) {
  .l-tags-container {
    display: flex;
    flex-wrap: wrap;
    justify-content: center;
    margin: 60px auto 0;
    max-width: 720px;
  }
}

@media only screen and (min-width: 64rem) {
  .l-tags-container {
    max-width: 1080px;
  }
}

.m-tag-card {
  border: 2px solid #000;
  border-radius: 10px;
  height: 200px;
  margin: 0 0 20px;
  position: relative;
 /* transition: all 0.25s cubic-bezier(0.02, 0.01, 0.47, 1);   */
}

.m-tag-card:hover {
  transform: translateY(-5px);
}

.m-tag-card:hover:before {
  box-shadow: var(--article-shadow-hover), 0 0 0 transparent;
}

@media only screen and (min-width: 48rem) {
  .m-tag-card {
    margin: 0 20px 40px;
    width: 320px;
  }
}

.m-tag-card:before {
  border-radius: 10px;
  bottom: 0;
 /* box-shadow: var(--article-shadow-normal), 0 0 0 transparent;  */
  content: "";
  left: 10px;
  position: absolute;
  right: 10px;
  top: 10px;
  transition: all 0.25s cubic-bezier(0.02, 0.01, 0.47, 1);
  z-index: 1;
}

.m-tag-card__link {
  background-color: var(--dark-bg-color);
  border-radius: 10px;
  display: block;
  height: 100%;
  overflow: hidden;
  position: relative;
  width: 100%;
  z-index: 2;
  text-decoration: none;
}

.m-tag-card__link.no-picture {
  background-color: var(--secondary-subtle-color);
}

.m-tag-card__picture {
  border-radius: 10px;
  height: 100%;
  left: 0;
  -o-object-fit: cover;
  object-fit: cover;
  opacity: 1;
  position: absolute;
  top: 0;
  width: 100%;
  z-index: 1;
}

.m-tag-card__info {
  bottom: 15px;
  color: var(--text-color);
  left: 15px;
  font-size: 24px;
  position: absolute;
  z-index: 2;
  background-color: rgba(256, 256, 256, 0.7);
  padding: 5px 10px;
  border-radius: 5px;
}

.m-tag-card__info.no-picture {
  color: var(--titles-color);
}

.m-tag-card__name {
  font-size: 2rem;
  font-weight: 700;
  letter-spacing: 0.3px;
  line-height: 1.3;
  margin: 0 0 5px;
  text-decoration: underline;
}

.m-tag-card__counter {
  display: block;
  font-size: 1.2rem;
  font-weight: 600;
  letter-spacing: 0.2px;
  text-decoration: overline;
}
</style>
The CSS
Now, modify this css, according to your need to match your theme. Visit the categories page to see the new page with all your tags in one place. For better accessibility add this page on you main navigation menu.
Check out some more Ghost related tutorial to improve you ghost blog experience below.
 Shounak Pal
 Shounak Pal
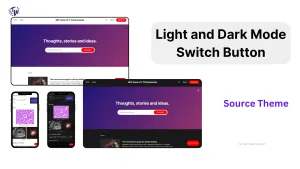
If you like this tutorial, drop a comment or share with other fellow Ghost Users. I will write many other Ghost related tutorials in the future like implementing a dark mode switching button on the top right corner of this blog, or social share buttons etc. To get a notification at your inbox subscribe for free. Thank you for reading the TechWeirdo and have a nice day.